Welding PPR (Polypropylene Random Copolymer) pipe fittings is a crucial skill for anyone involved in plumbing and piping systems. This process ensures leak-proof connections that can withstand high pressure and temperature variations. In this guide, we’ll walk you through the steps of welding PPR pipe fittings, discuss the tools you’ll need, and share some tips for success.
PPR pipes are popular in plumbing systems due to their durability, resistance to corrosion, and ability to handle hot and cold water. Welding these pipes involves using heat to join them, creating a strong, seamless connection. Here’s a step-by-step guide on how to weld PPR pipe fittings effectively.
PPR pipes are favored because they are lightweight, easy to install, and have a long lifespan. They are resistant to scale build-up and provide excellent thermal insulation. This makes them ideal for both residential and industrial piping applications.
Before you begin welding, gather the necessary tools and materials:
- PPR pipes and fittings: Ensure you have the correct size and type for your project.
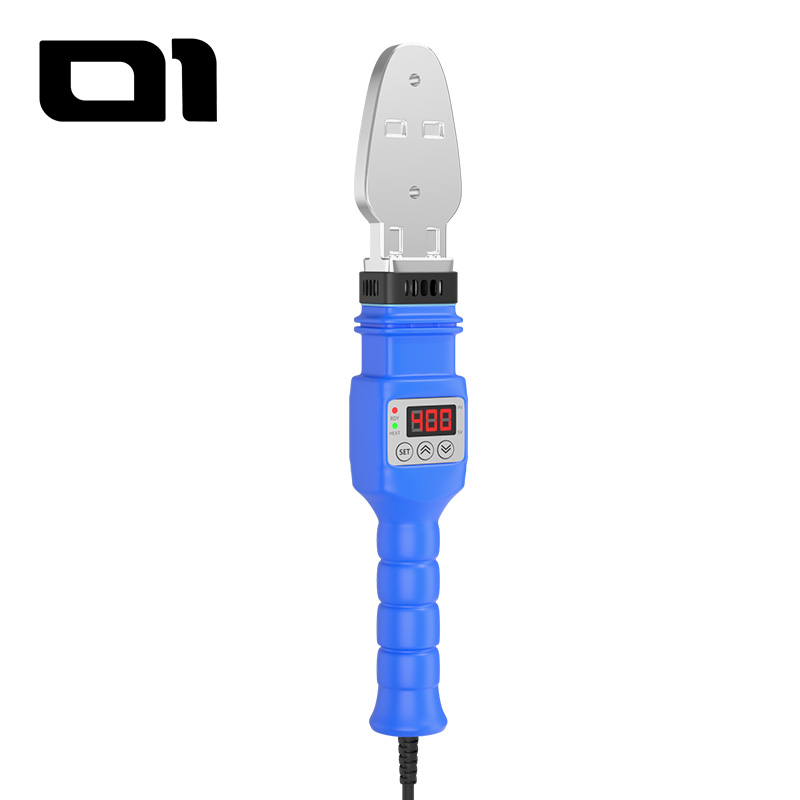
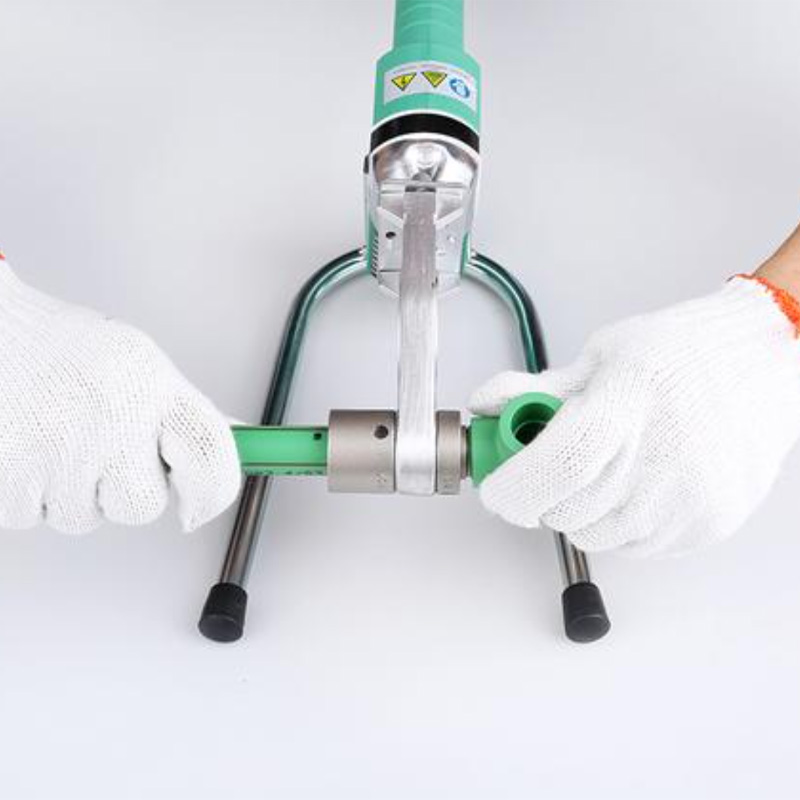
- PPR pipe welding machine: This tool heats the pipe ends so they can be joined.
- Pipe cutter: For cutting pipes to the required lengths.
- Measuring tape: To ensure precise cuts and fittings.
- Marker: For marking the welding points.
- Protective equipment: gloves, used to protect oneself from high temperatures and sharp edges..
Step-by-Step Guide to PPR Pipe Welding
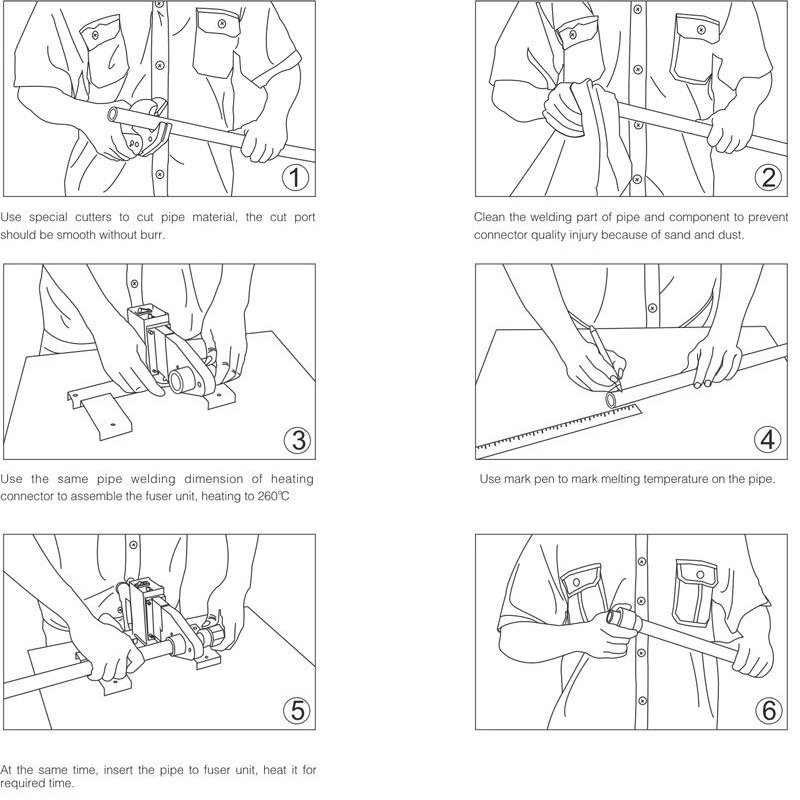
- Measure and Mark: Use a measuring tape to measure the length of pipe needed and mark it with a marker. Accuracy is crucial for a proper fit.
- Cut the Pipe: Use a pipe cutter to make a clean, straight cut. Ensure there are no burrs or rough edges, as these can affect the weld.
- Clean the Pipe Ends: Wipe the ends of the pipes and fittings to remove any dust, grease, or moisture. This ensures a clean weld.
- Heat the Welding Machine: Plug in the PPR pipe welding machine and set it to the correct temperature, usually around 260°C -280°C . Allow it to reach the desired heat level.
- Install the Heating Elements: Attach the appropriate-sized heating elements to the machine. These should match the diameter of the pipes and fittings you are working with.
- Heat the Pipe and Fitting: Once the machine is hot, insert the pipe into one side of the heating element and the fitting into the other. Hold them for the recommended time, usually around 5-7 seconds, depending on the pipe size.
- Join the Pipe and Fitting: Quickly remove the pipe and fitting from the machine and push them together. Ensure they are aligned correctly and press them firmly for a few seconds to secure the joint.
- Cool the Welded Joint: Allow the joint to cool naturally without moving it. This ensures a strong, durable bond.
- Check the Joint: Once cooled, inspect the joint for any gaps or misalignments. A properly welded joint should be smooth and seamless.
- Test for Leaks: If possible, run water through the pipe system to check for leaks. This confirms the integrity of your weld.
Common PPR Welding Mistakes and How to Prevent Them
- Practice: If you’re new to PPR welding, practice on spare pieces before tackling your main project.
- Consistent Pressure: Apply even pressure when joining pipes and fittings to ensure a strong bond.
- Temperature Control: Keep an eye on the welding machine’s temperature to prevent overheating or underheating the pipes.
- Proper Alignment: Misalignment can lead to weak joints. Take your time to ensure everything lines up perfectly.
- Safety First: Always wear protective gear and work in a well-ventilated area to avoid inhaling fumes.
- Rushing the Process: Allow adequate time for heating and cooling. Rushing can weaken the joint.
- Improper Cleaning: Dirt and debris can prevent a good weld. Clean all surfaces thoroughly before welding.
- Incorrect Temperature: Using the wrong temperature can lead to poor welds. Always follow the manufacturer’s guidelines.
Conclusion
Welding PPR pipe fittings is a skill that, once mastered, ensures reliable and efficient plumbing systems. By following this guide, using the right tools, and practicing proper techniques, you can achieve strong, leak-proof connections. Remember, safety and precision are key to successful PPR welding. Happy welding!
If you have any other questions, please contact us